
MAKING “GO FETCH” Part 3: Animatic
- David Gainey

- Oct 18, 2020
- 3 min read
Animatics are often made directly from storyboard images, but I wanted to make adjustments to the original ideas as I progressed and get a cleaner set of drawings so I decided to redo each panel. Working in Harmony to produce the new set, I quickly realized that timing them out as I went was going to slow down the process, so I decided to draw each panel as three frames on the timeline (leaving some wiggle room for inserts, etc., and working just big enough on the timeline to make cuts visible). This worked well.

I worked in a rougher “pencil” look so that I wouldn’t be tempted to draw final images. I wanted to keep it looser and focus as much as I could on story.
Here is the exported movie of all panels out of Harmony.
In addition to drawing enough images to fully tell the story, I also wanted to address big issues that are very hard to change down the line: overall shot composition, screen space over cuts, stage line and continuity.
Some adjustments I made were to “scale-up” all elements in the main bench scenes to better use the space, taking into account the different compositions and cuts that would be happening from shot to shot.
Also, I was very concerned that the reverse camera, from Man-on-bench to Dog-waiting-for-throw, would somehow be confusing or disorienting. So, I looked carefully at these cuts. At first I was imagining the shot of the Dog waiting for throw as more of a reverse shot from the Man on bench, and was quite careful to re-compose the shots to better match eyelines, and screen positions. But I came to realize in seeing it cut together that the shot of the dog is more of the Man character’s point of view (P.O.V), and can be looser in terms of alignment or matching.
You can see some of this shot process and exploration in the following images:


Once I had a full pass on all drawings needed for the animatic, I exported as a movie file and brought this into Premier to properly time out each image and adjust cuts where needed. There was some back and forth between Harmony and Premier if I decided that I needed a different drawing for a panel, but most of the work played nicely in the edit.

In the following sketch, I work through a section of film that was confusing in the original order. These notes help me to see the overall picture and clarify certain moments:
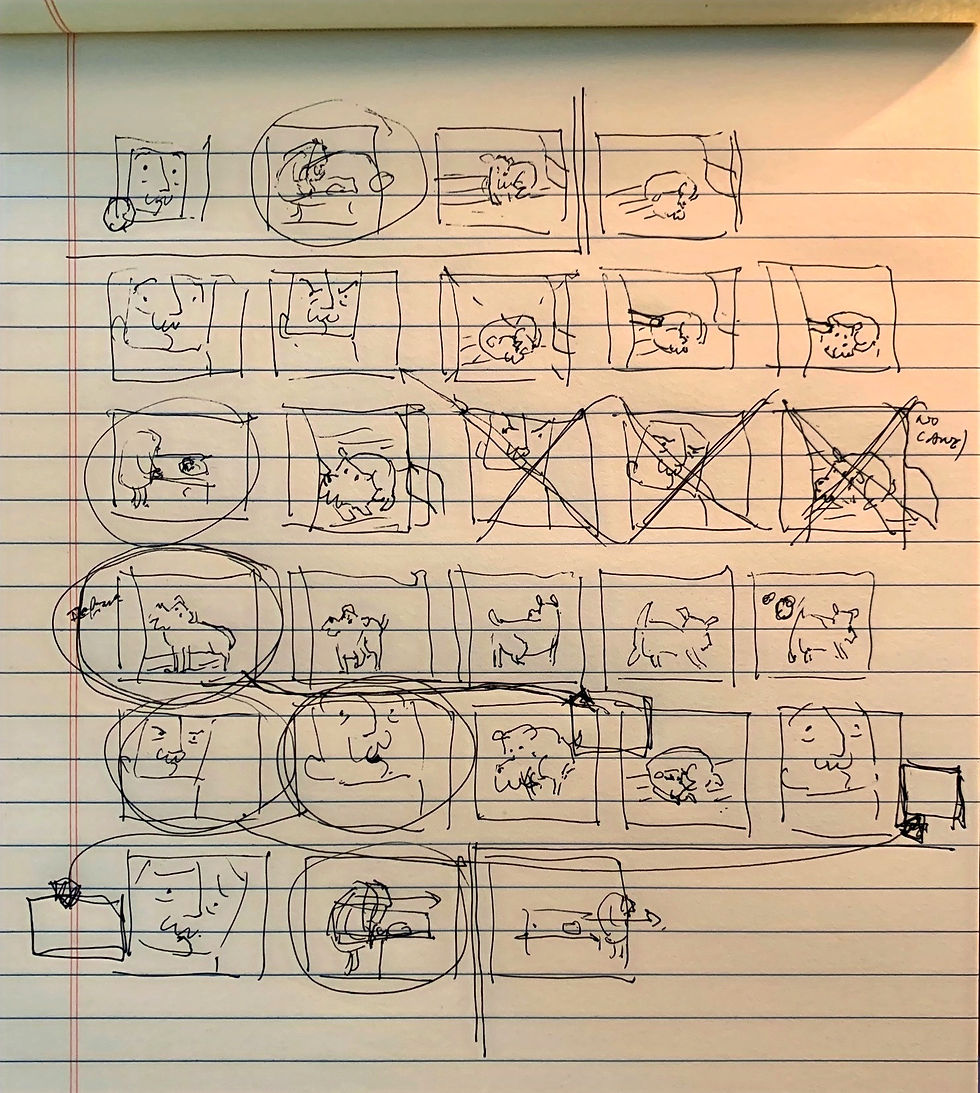
In addition to timing out the images, I also added a temp music track and even a little sound effect. This was important for me to be able to gauge the “speed” of the different beats. Your film played back without sound can feel very slow, and I wanted to get as close as I could to a final running time for the shots and the whole piece. So the added sound was a very useful tool for me. I was able to be more objective.
However, I really debated whether to post this final animatic on the blog for several reasons. First of all, a film is a little bit of a magic trick and by showing the whole film to this level of completion I feel like I’m losing any kind of surprise or entertainment value. Perhaps I should have clearly posted a SPOILER ALERT at the beginning of the post! Well, consider yourself warned. On further reflection, I realized that most people will hopefully see the final film months from now and later discover this record of the process. Also, by showing each stage fully I am committing to the purpose of this blog which is to share and inform.
I also considered adding the animatic without the audio. Hearing even a very temp sound track can really color your overall perception of the film, and in a worst case scenario it can influence other artists who may work on the film. (Yes, I really don’t want a future composer to hear this temp track.) While it’s an important part of the process for me, it is not a good representation of a final sound pass. I have some very specific ideas around sound design that will get fully implemented in post.
Here’s the full animatic. Enjoy.
I am very excited for the next steps. The plan is to animate to final image rather than do a rough blocking pass, so with each completed scene the film will be closer to complete. And in doing the animatic, I’ve grown excited again about the story and look forward to seeing it fully realized.
The animatic tends to be that part of the process that is shared with as many people as possible, to work out issues before a final pass. So, put on your producer caps!
How does this animatic play for you?
Is anything especially confusing?
What works well?


Comments